Hints and Tips
Taking Control of Aperture, Shutter Speed and ISO Settings
25/02/2019
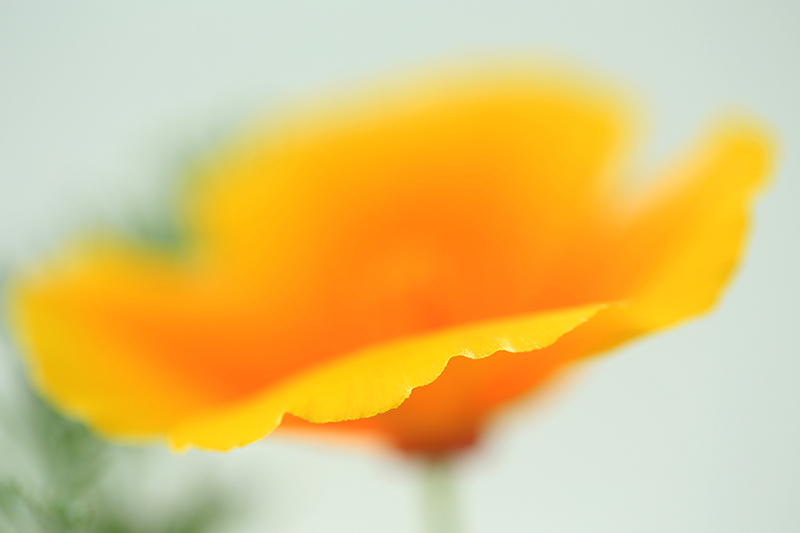
Poppy
This article outlines why it is important ro take control of aperture, shutter speed and ISO settings, and explains how to do this. I have also embedded a number of You Tube videos to illustrate the text in the article.
To return to the "Flower" galleries click here...
Introduction
To begin with, what are aperture, shutter speed and ISO?
These three components of exposure, which can be adjusted independently, determine whether or not a photograph is exposed correctly. They are often referred to as the "exposure traingle". A helpful way to visualise this is a tap filling a bucket of water. Imagine that a filled bucket represents a correct exposure. The opening in the tap through which the water flows can be large or small, just as the aperture in a camera can be large or small. The tap can be turned on for different periods of time, just as the shutter speed in a camera can be adjusted. In this example, making the bucket smaller is equivalent to making the sensor more sensitive to light - a smaller bucket will require less water to fill it, just as a properly exposed photograph will require less light if the sensor has been made more sensitive to light. So, just as filling the bucket is determined by how much the tap is turned on, the length of time the tap runs and the size of the bucket, so a correctly exposed photograph is determined by the aperture, the shutter speed and the ISO settings selected. This is illustrated below.

The main reason that many photographers, particularly inexperienced photographers, use the fully automatic setting on their cameras is to ensure that their photographs are exposed properly. The problem with this approach is that the camera, and not the photographer, determines which combination of aperture, shutter speed and ISO settings is selected. However, these settings have a significant impact on how the final photograph looks. For example, if you are photographing sports events or other fast moving subjects you will want to have control of the shutter speed to avoid getting blurred images. However, if you are photographing landscapes, other static subjects, or portraits, it is more important to take control of the aperture settings as you will probably want to determine those areas of your photographs that are in sharp focus and those that are not. The problem is that even the very latest camera models cannot know what is in your mind as the photographer!! The solution is for the photographer to take control of these important settings.
Taking Control
Depending on the type of photograph you are taking, and what you want to achieve from a creative perspective, you will mainly want to take control of either the aperture or the shutter speed. On occasions you may also want to, or need to, adjust the ISO settings. I will look at each of these briefly below.
Shutter Speed
This is perhaps the most obvious factor to to understand. As indicated above, the shutter speed setting allows you to determine how long the lens aperture remains open to let light pass through the lens on to the sensor (or film). Most of the time, shutter speeds are fractions of seconds, typically 1/30, 1/60, 1/125, 1/250, 1/500, etc of a second. Slower or faster shutter speeds can also be set. As indicated above, faster shutter speeds shoud be used to capture fast moving subjects. They should also be used when hand holding the camera (ie when not using a tripod) to avoid blurred photographs resulting from camera shake - image stabilisation now found on many cameras and lenses can help to reduce camera shake, but the shutter speed used still needs to be considered.
It is worth noting that for artistic reasons the photographer may also want to select slower than normal shutter speeds - even as slow as a few seconds. For example, if you want to blur flowing water. The photograph below of Brothers Water in the lake district was taken with a shutter speed of 1/20 of a second (with an aperture of f18). When such shutter speeds are used it is necessary to use a tripod, even if your camera has image stabillisation - however, as noted in the "Totally Sharp Photographs" article, you should switch off image stabilisation when your camera is mounted on a tripod.

Aperture
It is not so immediately obvious how the aperture setting affects how your photographs look. As indicated above, the aperture is the size of the opening in the lens through which light passes. The aperture, normally referred to as f stops, has a scale typically ranging from f1.4 (the larger opening) to f32 and beyond (the smaller openings) - yes it is confusing and counter intuitive that small f numbers equal large apertures and large f numbers equal small apertures!! Typical f stops are f1.4, f2.8, f4, f5.6, f8, f11, f16, f22, etc - admittedly these are strange numbers!
The main impact of the f stop selected is the amount of the photograph that is in focus - referred to as "depth of field". If a large aperture (for example a small f number such as f2.8) is selected, then a very narrow section of the photograph will be in sharp focus, while with a small aperture (large f number such as f16) a much wider area of the photograph will be in sharp focus. There are other things that have an impact on depth of field - for example, a wide angle lens will deliver greater depth of field than will a telephoto lens. However, I will not dwell on this in this article.
Given the nature of the photographs that I take, primarily landscapes and flowers, setting the appropriate aperture is more important to me with the shutter speed being less important. I will look at this in a bit more detail later in this article.
ISO
ISO is the third factor in the exposure triangle. It has a scale which typically starts at ISO 50 and goes up to around ISO 100,000, although in some cameras it can go higher than this. As indicated at the start of this article, ISO relates to the sensitivity of the sensor. The higher ISO that you set on your camera, the more sensitive to light the sensor is made, meaning that less light is required for a correctly exposed photograph. However, higher ISO settings can impair the quality of the photographs taken - for example, in extreme cases digital "noise" can appear, which is a bit like grain that appears on photographs taken with faster film. Higher ISO settings can also impair the colours captured. Improvements in sensor technology, specifically in relation to improving higher ISO photography, has been a major focus for camera manufacturers in recent years. However, despite these advances, it is better to use as low an ISO setting as possible, as this guarantees higher quality images.
Therefore, ISO should be viewed mainly as an enabling setting, and higher settings should be used only where the amount of available light is an issue. For example, taking action shots on a dull day, or photographing indoors where it is not possible to use flash. Even then, ISO settings should not be increased more than is necessary.
Shutter, Aperture and ISO Working Together
In simple terms, for any given photograph that you are taking, there will be one correct exposure. Also, these three variables are linked - for example a shutter speed of 1/125 and an f stop of f8, will deliver the same exposure (amount of light) as will a shutter speed of 1/60 and an f stop of f11, or as a shutter speed of 1/250 and an f stop of f5.6, etc. Similarly, a change of ISO will alter the shutter speed and/or f stop required for a correct exposure. Left to its own automatic devices, a camera will select a combination of shutter speed, aperture and ISO that will result in a well exposed photograph. However, as described earlier, the camera does not know what effect you are trying to achieve.
Semi-automatic Settings
This all sounds very complicated, and you could be excused for wondering if you should just set the camera on fully automatic, and let it get on with it! However, help is at hand in the form of semi-automatic settings.
Many cameras, and certainly all SLR cameras, have "shutter speed priority" and "aperture priority" settings. The former allows you, the photographer, to select the shutter speed you want to use, with the camera automatically setting the aperture required for a correct exposure. Similarly, the latter allows you to select the aperture you want to use while the camer automatically sets the shutter speed required for a correct exposure.
Shutter Speed Priority
This is the semi-automatic setting you should use if you are photographing fast moving subjects and need to control your shutter speed. I do not tend to take these types of photographs, but I would use this setting if I am hand holding my camera. In these circumstances it can be a good idea to use image stabilisation if your camera or lens has this facility. I would also set the camera's ISO setting to automatic, which you can do in conjunction with shutter speed priority - this will allow you to use faster shutter speeds with the camera compensating by making the camera's sensor more sensitive to light. This can be a particularly useful combination when photographing indoors without flash. However, do make sure that the ISO settings are not creeping up too much, as this could degrade the quality of your images - as explained above.
Aperture Priority
This is the semi-automatic setting that I use most of the time, apart from when I am taking panorama photographs - see my article on "Taking Panorama Photographs". I use aperture priority because I need to control depth of field in the landscape and flower photographs that I take. In my landscape photographs I like to achieve sharp focus from the near foreground to the distant horizon, which requires the use of a small aperture - see my article on "Totally Sharp Photographs".
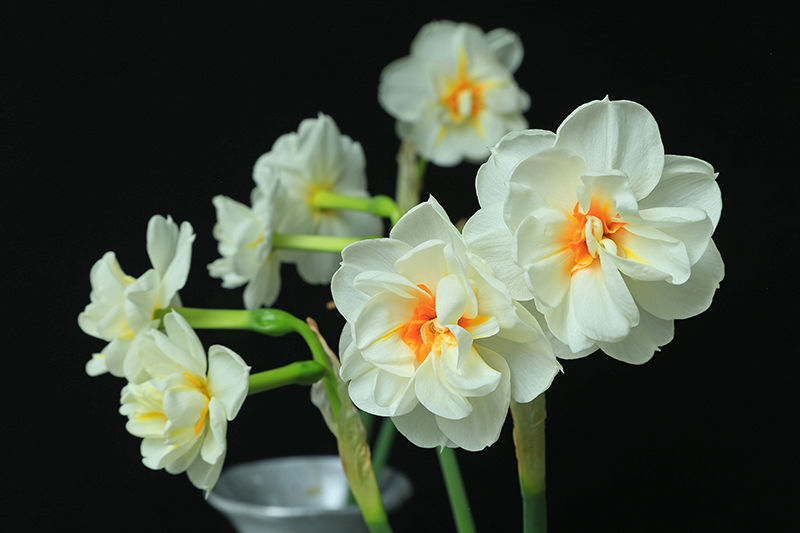
It is also very important for me to have total control of aperture when taking flower photographs. Often I select a large aperture to get a very narrow depth of field, and then focus on a specific part of the flower - creatively, this can be very effective. At other times, I want to have more of the flower in sharp focus, in which case I select a smaller aperture. The two photographs of daffodils that follow below show the difference that aperture settings can make to the same photograph. For the first photograph, the shutter speed is 6 seconds with an aperture of f18. For the second photograph the shutter speed is 0.3 seconds with an aperture of f4. There was around 8 inches between the blooms in the background and the blooms in the foreground, and in both photographs I focused on the centre of the foreground blooms. Note that the two different settings have altered significantly how the blooms in the background appear. It is a matter of personal choice which you prefer, but I prefer the second photograph. It is also worth noting that when taking portraits the same principles apply, and it is often better to use larger apertures (smaller f numbers), as this throws distracting backgrounds out of focus, as in the second photograph below.

Programme Settings
It is also worth pointing out that a number of cameras, particularly beginner models, have a range of what are known as "Programme" settings - for example, for taking photographs of portraits, landscapes, flowers, night scenes, etc. When these settings are selected, the camera will replicate the types of aperture/shutter speed/ISO considerations referred to in this article, depending on the type of photograph being taken. While these are undoubtedly a step up from just using a fully automatic camera setting, they do not give the photographer as much control as when using aperture priority or shutter speed priority settings. There is no substitute for understanding the effects that aperture, shutter speed and ISO have on how photographs look, and how to control these in your photography.
Summary
For the reasons outlined above, this is a very important topic to understand in order to achieve the types of photographs that you had in your mind's eye. Once grasped, it is actually quite logical and straightforward, but it is complicated to explain. However, I hope this article, and the embedded You Tube videos, have been helpful. The You Tube video that follows demonstrates much of the above.
Finally, the internet is a rich source of information, and by Googling the above topics you will be get further information and tutorials. I would encourage you to use these resources to the full.
If you have any questions or comments on the contents of this article, contact me here...
To return to the "Flower" galleries click here...
Introduction
To begin with, what are aperture, shutter speed and ISO?
- Aperture is the size of the opening in the lens through which light passes to reach the camera's sensor (or film).
- Shutter speed is the length of time for which the aperture remains open.
- ISO is a scale that relates to the sensitivity to light of the sensor.
These three components of exposure, which can be adjusted independently, determine whether or not a photograph is exposed correctly. They are often referred to as the "exposure traingle". A helpful way to visualise this is a tap filling a bucket of water. Imagine that a filled bucket represents a correct exposure. The opening in the tap through which the water flows can be large or small, just as the aperture in a camera can be large or small. The tap can be turned on for different periods of time, just as the shutter speed in a camera can be adjusted. In this example, making the bucket smaller is equivalent to making the sensor more sensitive to light - a smaller bucket will require less water to fill it, just as a properly exposed photograph will require less light if the sensor has been made more sensitive to light. So, just as filling the bucket is determined by how much the tap is turned on, the length of time the tap runs and the size of the bucket, so a correctly exposed photograph is determined by the aperture, the shutter speed and the ISO settings selected. This is illustrated below.
The main reason that many photographers, particularly inexperienced photographers, use the fully automatic setting on their cameras is to ensure that their photographs are exposed properly. The problem with this approach is that the camera, and not the photographer, determines which combination of aperture, shutter speed and ISO settings is selected. However, these settings have a significant impact on how the final photograph looks. For example, if you are photographing sports events or other fast moving subjects you will want to have control of the shutter speed to avoid getting blurred images. However, if you are photographing landscapes, other static subjects, or portraits, it is more important to take control of the aperture settings as you will probably want to determine those areas of your photographs that are in sharp focus and those that are not. The problem is that even the very latest camera models cannot know what is in your mind as the photographer!! The solution is for the photographer to take control of these important settings.
Taking Control
Depending on the type of photograph you are taking, and what you want to achieve from a creative perspective, you will mainly want to take control of either the aperture or the shutter speed. On occasions you may also want to, or need to, adjust the ISO settings. I will look at each of these briefly below.
Shutter Speed
This is perhaps the most obvious factor to to understand. As indicated above, the shutter speed setting allows you to determine how long the lens aperture remains open to let light pass through the lens on to the sensor (or film). Most of the time, shutter speeds are fractions of seconds, typically 1/30, 1/60, 1/125, 1/250, 1/500, etc of a second. Slower or faster shutter speeds can also be set. As indicated above, faster shutter speeds shoud be used to capture fast moving subjects. They should also be used when hand holding the camera (ie when not using a tripod) to avoid blurred photographs resulting from camera shake - image stabilisation now found on many cameras and lenses can help to reduce camera shake, but the shutter speed used still needs to be considered.
It is worth noting that for artistic reasons the photographer may also want to select slower than normal shutter speeds - even as slow as a few seconds. For example, if you want to blur flowing water. The photograph below of Brothers Water in the lake district was taken with a shutter speed of 1/20 of a second (with an aperture of f18). When such shutter speeds are used it is necessary to use a tripod, even if your camera has image stabillisation - however, as noted in the "Totally Sharp Photographs" article, you should switch off image stabilisation when your camera is mounted on a tripod.
Aperture
It is not so immediately obvious how the aperture setting affects how your photographs look. As indicated above, the aperture is the size of the opening in the lens through which light passes. The aperture, normally referred to as f stops, has a scale typically ranging from f1.4 (the larger opening) to f32 and beyond (the smaller openings) - yes it is confusing and counter intuitive that small f numbers equal large apertures and large f numbers equal small apertures!! Typical f stops are f1.4, f2.8, f4, f5.6, f8, f11, f16, f22, etc - admittedly these are strange numbers!
The main impact of the f stop selected is the amount of the photograph that is in focus - referred to as "depth of field". If a large aperture (for example a small f number such as f2.8) is selected, then a very narrow section of the photograph will be in sharp focus, while with a small aperture (large f number such as f16) a much wider area of the photograph will be in sharp focus. There are other things that have an impact on depth of field - for example, a wide angle lens will deliver greater depth of field than will a telephoto lens. However, I will not dwell on this in this article.
Given the nature of the photographs that I take, primarily landscapes and flowers, setting the appropriate aperture is more important to me with the shutter speed being less important. I will look at this in a bit more detail later in this article.
ISO
ISO is the third factor in the exposure triangle. It has a scale which typically starts at ISO 50 and goes up to around ISO 100,000, although in some cameras it can go higher than this. As indicated at the start of this article, ISO relates to the sensitivity of the sensor. The higher ISO that you set on your camera, the more sensitive to light the sensor is made, meaning that less light is required for a correctly exposed photograph. However, higher ISO settings can impair the quality of the photographs taken - for example, in extreme cases digital "noise" can appear, which is a bit like grain that appears on photographs taken with faster film. Higher ISO settings can also impair the colours captured. Improvements in sensor technology, specifically in relation to improving higher ISO photography, has been a major focus for camera manufacturers in recent years. However, despite these advances, it is better to use as low an ISO setting as possible, as this guarantees higher quality images.
Therefore, ISO should be viewed mainly as an enabling setting, and higher settings should be used only where the amount of available light is an issue. For example, taking action shots on a dull day, or photographing indoors where it is not possible to use flash. Even then, ISO settings should not be increased more than is necessary.
Shutter, Aperture and ISO Working Together
In simple terms, for any given photograph that you are taking, there will be one correct exposure. Also, these three variables are linked - for example a shutter speed of 1/125 and an f stop of f8, will deliver the same exposure (amount of light) as will a shutter speed of 1/60 and an f stop of f11, or as a shutter speed of 1/250 and an f stop of f5.6, etc. Similarly, a change of ISO will alter the shutter speed and/or f stop required for a correct exposure. Left to its own automatic devices, a camera will select a combination of shutter speed, aperture and ISO that will result in a well exposed photograph. However, as described earlier, the camera does not know what effect you are trying to achieve.
Semi-automatic Settings
This all sounds very complicated, and you could be excused for wondering if you should just set the camera on fully automatic, and let it get on with it! However, help is at hand in the form of semi-automatic settings.
Many cameras, and certainly all SLR cameras, have "shutter speed priority" and "aperture priority" settings. The former allows you, the photographer, to select the shutter speed you want to use, with the camera automatically setting the aperture required for a correct exposure. Similarly, the latter allows you to select the aperture you want to use while the camer automatically sets the shutter speed required for a correct exposure.
Shutter Speed Priority
This is the semi-automatic setting you should use if you are photographing fast moving subjects and need to control your shutter speed. I do not tend to take these types of photographs, but I would use this setting if I am hand holding my camera. In these circumstances it can be a good idea to use image stabilisation if your camera or lens has this facility. I would also set the camera's ISO setting to automatic, which you can do in conjunction with shutter speed priority - this will allow you to use faster shutter speeds with the camera compensating by making the camera's sensor more sensitive to light. This can be a particularly useful combination when photographing indoors without flash. However, do make sure that the ISO settings are not creeping up too much, as this could degrade the quality of your images - as explained above.
Aperture Priority
This is the semi-automatic setting that I use most of the time, apart from when I am taking panorama photographs - see my article on "Taking Panorama Photographs". I use aperture priority because I need to control depth of field in the landscape and flower photographs that I take. In my landscape photographs I like to achieve sharp focus from the near foreground to the distant horizon, which requires the use of a small aperture - see my article on "Totally Sharp Photographs".
It is also very important for me to have total control of aperture when taking flower photographs. Often I select a large aperture to get a very narrow depth of field, and then focus on a specific part of the flower - creatively, this can be very effective. At other times, I want to have more of the flower in sharp focus, in which case I select a smaller aperture. The two photographs of daffodils that follow below show the difference that aperture settings can make to the same photograph. For the first photograph, the shutter speed is 6 seconds with an aperture of f18. For the second photograph the shutter speed is 0.3 seconds with an aperture of f4. There was around 8 inches between the blooms in the background and the blooms in the foreground, and in both photographs I focused on the centre of the foreground blooms. Note that the two different settings have altered significantly how the blooms in the background appear. It is a matter of personal choice which you prefer, but I prefer the second photograph. It is also worth noting that when taking portraits the same principles apply, and it is often better to use larger apertures (smaller f numbers), as this throws distracting backgrounds out of focus, as in the second photograph below.
Programme Settings
It is also worth pointing out that a number of cameras, particularly beginner models, have a range of what are known as "Programme" settings - for example, for taking photographs of portraits, landscapes, flowers, night scenes, etc. When these settings are selected, the camera will replicate the types of aperture/shutter speed/ISO considerations referred to in this article, depending on the type of photograph being taken. While these are undoubtedly a step up from just using a fully automatic camera setting, they do not give the photographer as much control as when using aperture priority or shutter speed priority settings. There is no substitute for understanding the effects that aperture, shutter speed and ISO have on how photographs look, and how to control these in your photography.
Summary
For the reasons outlined above, this is a very important topic to understand in order to achieve the types of photographs that you had in your mind's eye. Once grasped, it is actually quite logical and straightforward, but it is complicated to explain. However, I hope this article, and the embedded You Tube videos, have been helpful. The You Tube video that follows demonstrates much of the above.
Finally, the internet is a rich source of information, and by Googling the above topics you will be get further information and tutorials. I would encourage you to use these resources to the full.
If you have any questions or comments on the contents of this article, contact me here...
To return to the "Flower" galleries click here...